Tuesday, June 24, 2014

the quilt that almost wasn't


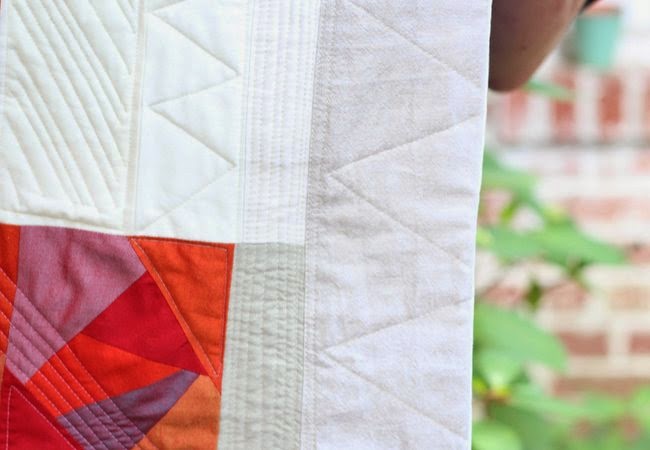
Back in early May, I made this quilt using an upcoming line called Feather River from Birch Organic Fabric for quilt market. I was excited to work with this line as I really liked the colors and patterns in these fun prints.


I finished the quilt top with plenty of time to spare (despite that I had just returned home from my 3rd trip in 5 weeks) and got ready to quilt it with my walking foot. Well, no point in going into details again but my walking foot was "unavailable" so I figured instead I would FMQ (free motion quilt) it. That would have been no problem a year ago but since it has been about that long since I've FMQ'd anything bigger than a mini, I kind of had to remember how!


I started FMQing the flower pattern I used to use frequently but it was just awful so I did what I don't usually do and unpicked it and put on my regular piecing foot, thinking I could just straight line quilt with that. Well, um, nope - that didn't work at all. Though I will say it has before so I'm sure stress had something to do with this :)


So, I unpicked the stitches AGAIN and put the free motion foot back on and decided to try the loop quilting you can see in the photo BUT my thread kept breaking, my stitches kept skipping, and I can't even remember what else but it just wasn't working. I put a photo with a call for advice on Instagram and within minutes I had several people offering their help. Hours later, a couple of facetime chats, and tons of suggestions tried, I was still having some issues but on a much smaller scale and I was able to finish the quilt. Quilty friends are the best! 


I should note that, because of all the travel, while I finished the quilt top with time to spare, I meant days, not the weeks it would have taken to bring my machine to the dealer and get it (and the walking foot) checked/fixed. Oh, and just FYI, the binding in the above photo is the canoes print from feather river - so cute! 


Anyway, the quilt made it to quilt market and I just wrote a tutorial/pattern if you want to try this design yourself. You can find it on the Birch blog.

I really should write a post about all the helpful advice I received that enabled me to actually finish the quilt. Okay, adding it to the list . .  .

Friday, June 20, 2014

a new book bag

echino kokka essex linen tote bag

My 11 year old "graduated" from elementary school this week (seriously, where does the time go!?!?!) so we've had lots of family visiting. 

echino kokka essex linen tote bag


That coupled with the fact that my sewjo disappeared again after I finished my oakshott pillows means that I haven't seen my sewing machine for the past week or so. But for some reason, I actually was briefly motivated to sew when I had a few minutes alone during my youngest daughter's nap this week. With the limited time I had, I just wanted to sew something quick and easy so I decided to use my tutorial to make another "simple to sew" tote bag

echino kokka essex linen tote bag

The fabric on the outside is echino decoro paired with essex yarn-dyed linen and I lined it with an older print from Melody Miller.

echino kokka essex linen tote bag

While I was sewing this bag, I started thinking about different variations to make with this tutorial so I'm excited to try and see if some of my ideas will work (and you know I'll share them here whether they are successes or failures!)

If you are looking for the giveaway from Warp & Weft, click here. It is still open for a few more days (until June 29, 2014.)

Wednesday, June 11, 2014

oakshott ruby


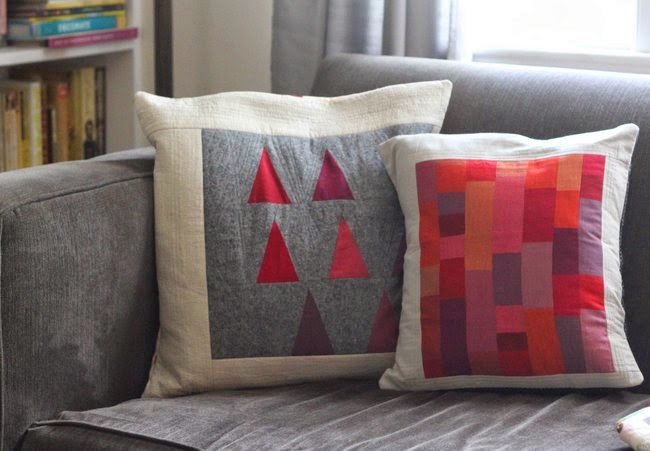
oakshott ruby quilt pillow

I am so excited to be part of the Oakshott Ruby Mini Quilt Challenge hosted by Sew Mama Sew. I've been admiring oakshott fabrics for quite a while so I was thrilled to have this opportunity to actually see it in person, not to mention to use it in a project!

oakshott ruby bundle

I received the ruby red fat 8th bundle which included 16 fabrics and I knew right away that I wanted to use every one of them in my quilt (though ultimately, I think I only used 15 of the 16.) The challenge was to make a mini quilt but I actually made, um, 3?!?!?  

oakshott ruby quilt pillow

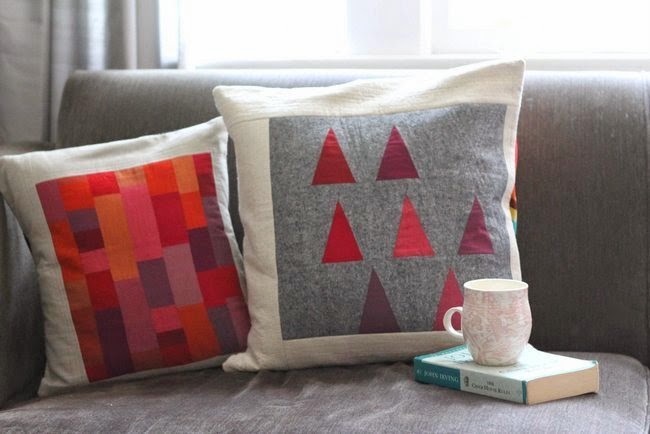
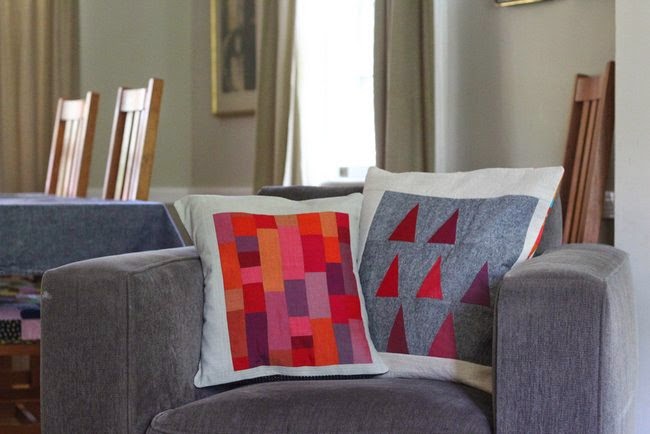
Quilt 1:  For the first mini, I started by cutting a small amount off of each fabric (about 1" to 1 1/2" from the short side) and sewing them together in strips. I then sewed the strips together and framed it with a chambray fabric (at least I think it is chambray) which I heavily quilted with straight lines. As I had planned to leave the oakshott unquilted, I substituted flannel for the batting. And then I finished the mini into a pillow by adding a simple envelope backing.

oakshott ruby quilt pillow

Quilt 2: The pillow looked so lonely on my couch that I figured I should make it a friend! This time, I cut the oakshott into triangles and used a dark gray essex yarn-dyed fabric for the background. I then framed it with a border of linen that was similar in color to the chambray used in the first mini. I heavily quilted the linen border with straight lines (to complement the first mini) and for the gray background, I quilted a bunch of intersecting diagonal lines.

oakshott ruby quilt pillow

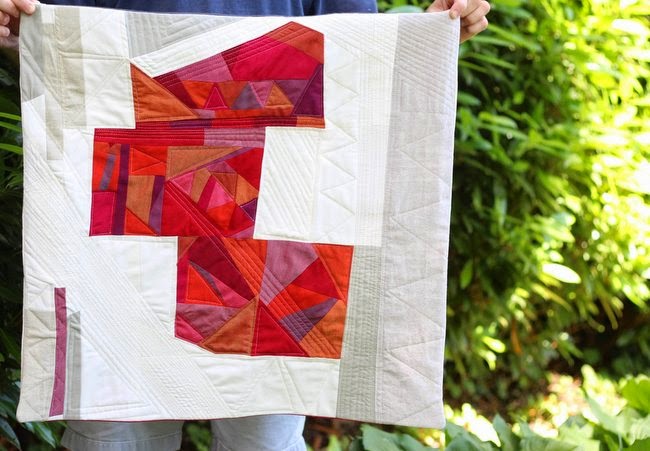
Quilt 3: After I finished the second mini, I added the large leftover pieces to my stash; however, I still had the small scraps from the first two projects - what to do, what to do. I mean, I could have just added them to my scrap drawer but instead I started sewing them together. And the next thing I knew, I had made another mini with the scraps. I sewed this one with absolutely no plan - and while I questioned my piecing choices often while making it, I decided to just keep going. 

oakshott ruby quilt pillow

To be honest, I'm not sure how I feel about this one and I wasn't even sure I wanted to share it on my blog, at the very least not in this post. I actually had this post finished well before I clicked the publish button because of this indecision but since quilt blogging is about sharing the successes and the failures, I decided to leave it in! I think I would have liked it better if I made each section an actual rectangle instead of sewing some of  the background fabrics to the oakshott on an angle. But oh, well.

oakshott ruby quilt pillow

I decided to really experiment with the quilting on this one and I am so glad I did. I quilted all sorts of different shapes, used a few different colors of thread, and I quilted some of it with heavy, matchstick quilting while other parts I quilted quite lightly. Again, there are some things I would change with the quilting (including quilting more of the ruby sections) but overall, I had a lot of fun doing it and it is something I am going to definitely try again.

oakshott ruby quilt pillow

Thanks so much to Sew Mama Sew and Oakshott Fabrics for giving me the chance to work with these great fabrics. I definitely hope to use oakshott fabrics again! 

And be sure to visit the other bloggers involved in this challenge:

Debbie of A Quilter's Table
Malka of A Stitch in Dye
Deborah of Whipstitch

Friday, June 6, 2014

social media?

oakshott ruby bundle

I just want to start this post by saying that I included these fabric photos in this post for no other reason than to add "visual interest." I'm currently making something with this bundle of Oakshott Ruby which I'll post about next week but since I love to take photos of fabric . . . 

oakshott ruby bundle

How do you use social media? When I first started blogging (over two years ago - wow!), I signed up for everything out there but quickly realized I couldn't keep up with so many different outlets. At some point, I decided I would just stick with blogging and Instagram - and I guess flickr to some extent. 


oakshott ruby bundle

Yes - I still like blogs! I like writing mine and reading others. I actually really like seeing several photos of quilts. I like reading the story behind the quilts. I like to hear about your process of making the quilt - what went well and what went wrong.

oakshott ruby bundle

And I love Instagram (come find me on there - I'm @plumandjune.) I like seeing the snippets of daily life, the WIPS, the finishes and I REALLY like all the interaction that happens over there.  

oakshott ruby bundle


I've recently started using Pinterest again (so I guess I should probably add a follow me on pinterest button back to sidebar soon - you can find me here: http://www.pinterest.com/plumandjune/ ) I'm still not exactly sure how to integrate Pinterest into my blog life but I've decided to start by creating a pin board of my projects. Regardless of how I use it for plum and june, I still like using it as a place to keep tips, tutorials, recipes, home ideas, etc so that I can easily find them later.

oakshott ruby bundle

I'm running out of the oakshott fabric photos so I'll finish this post and leave you with my questions:

1. How do you use social media - both in your personal life and in your blog life?
2. How do you use pinterest as part of your blog life - do you use it to promote your blog posts? 
3. For those of you who don't have blogs, what is your take on social media? 
4. Do you tend to focus on just one or two outlets or do you use everything available? What do you think are the pros or cons?
5. Do you follow blogs using a reader (like bloglovin' or feedly), by email, or do you check social media to see when someone publishes a new post? 

If you want to follow me on social media, find me on Instagram (@plumandjune - or click here), pinterest (http://www.pinterest.com/plumandjune/), and flickr (click here to get to my flickr page).   

Monday, June 2, 2014

three more geraniums - what should I make next?


geranium dress

I apparently must really love the geranium dress because I have now made 4 of them for my 2 year old daughter. While I probably will make more of these (and might even make one for one of my older daughters,) I welcome any suggestions you have for what pattern I should try next.

geranium dress

I think my daughter's favorite version is this second one  - probably because with the fabrics I used, it looks a bit costume-y (and I, um, referred to it as something Elsa (the character from her favorite movie) would probably wear because of the colors which really won her over!)


geranium dress


I'm not sure what fabric that is that I used for the bottom on the 3rd version - I think it might be a chambray - but the bottom got pretty wrinkly after I washed it. Since the dress is for a 2 year old, I'm not going to worry about it (and I seriously doubt that I'll iron it) but I hadn't expected that. And I'm still glad I used that fabric since I think it pairs really well with the AHM print.


geranium dress


And for my fourth version, I, for some reason I can't remember, used the 3T bodice pattern. It mostly fits fine but the armholes are really big.  But as you can see in the photos, I have finally figured out how to make buttonholes - they are far from perfect but still - YAY!!!


geranium dress


My daughter is going through a phase where she only wants to pose for photos when SHE wants to pose so I basically kept the camera close by while she was wearing the dress and I managed to get some decent photos (I think.)


geranium dress

geranium dress

geranium dress